

No one tells you how much adjusting you really have to do when you have a baby. Sure, I didn’t expect my jeans to fit for a few months (ahem… or maybe more than a few), but I don’t think I was told how long it takes for the rest of life to get back to normal, if it ever does.
Ok, if I’m being honest, I suppose plenty of people told me. I chose not to listen to them.
One of the things I have been doing a lot less of since the arrival of our little girl is decorating cookies. I love to decorate cookies, but royal icing, food coloring, and intricate piping are not things that go well with little girls who like to grab everything they see and put it in their mouth. I know this is one of those things that will get easier as she gets older. Well, I imagine it will get harder first (Crawling is just around the corner… Heaven help us all!), but eventually it will get easier. I often daydream of spending the afternoon in the kitchen with her. Sure, I know it will be messy, but it will be so much fun to see what she creates! Right now her creations are limited to baby food finger paintings on her face (and anything else she can reach).
I have squeezed in some time (i.e. stayed up far too late) to decorate cookies a few times since she was born. I managed to decorate a few Christmas cookies in December, and then a friend from church asked if I would do some cookie bouquets for a few middle school-aged boys who were in a musical at school. I wasn’t entirely sure I’d be able to pull it off, but I decided to go for it anyway. I’m glad I did.
Let me just say… Cookie bouquets are a great idea for congratulatory gifts for musicals, concerts, etc. Flowers may be OK for girls, but I think everyone is happier with cookies! Plus, you can personalize them and make them lots of fun.

As I was creating the cookie pops for the bouquets (or, shall we call them bundles so that they are not so girly?), I decided to snap a few photos to share with you. Making cookie pops is quite easy, and they are great for decorating both cupcakes and cakes. And, of course, you can make a cookie bouquet with them, as well.

How To Make Cookie Pops
What you’ll need…
- Cookie Dough – You want dough that is sturdy enough for decorated cookies. Vanilla bean is my standard cookie of choice, but I’ve got lots of other recipes you can try – Nutella, Dark Cocoa and Molasses, and even Spiced Butter Rum!
- Cookie Baking Essentials – To roll out and bake your cookie dough, you’ll also need a rolling pin, some extra flour, cookie cutters, baking sheets and parchment paper (or silicone liners).
- Lollipop Sticks – You can buy lollipop sticks at just about any craft store. Just look in the candy making/cake decorating section. Be careful to consider what length you want. If you’re making a bouquet, go for the long ones so you have plenty of length to work with.
- Royal Icing and Other Decorations – Of course, you don’t have to decorate your cookie pops, but I think they’ll be a lot more fun if you do! If you’re new to royal icing, be sure to check out this simple recipe as well as a few tips for fuss-free decorating.
Once you’ve gathered all of your supplies, you’re ready to start assembling and baking your cookie pops!
- Preheat the oven to the temperature indicated in your cookie recipe.
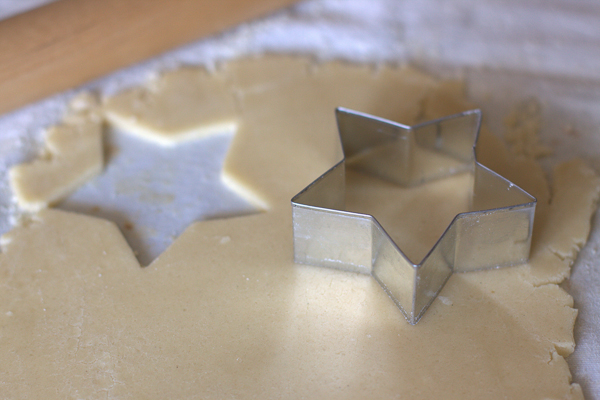
- Roll your cookie dough out on a lightly floured surface, rolling it a bit thinner than you normally would (about 1/8-inch thickness).
- For each cookie pop, cut out two cookies.
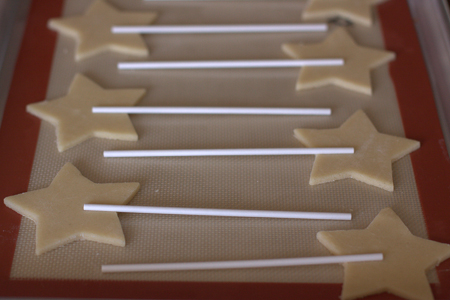
- Place one cookie on a baking sheet lined with either parchment or a silicone baking mat.
- Place the lollipop stick on the cookie in the position you want it to be for the cookie pop. The stick will be in the inside of the cookie and the top (right side) of the cookie will be facing up, toward you.
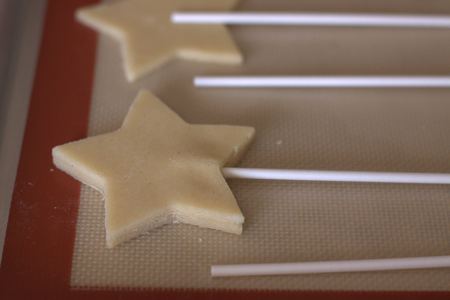
- Carefully line up the second cookie cutout and place it on top of the first cookie and the lollipop stick. Gently press the two cookies together. Be careful not to smush the cookies togther too forcefully… You don’t want to mess up the shape of your cookie.
- Repeat until your baking sheet is full of cookie pops.
- Transfer the baking sheet to the freezer for about 10 minutes. This will help the cookies keep their shape when they bake.
- Then, bake your cookie pops (according to the cookie dough recipe). Keep in mind that your double-layer cookies may be a bit thicker than the cookies in the recipe and you may need an extra minute or two.
- Let the cookies cool completely before decorating.
- If you decorate with royal icing, let the icing dry overnight before arranging the cookies on a cake, cupcakes, or as a cookie bouquet.

Your cookies are always so amazing!!! These cookie pops look like so much fun. And someday, I can’t wait for the photos when your daughter is cooking WITH you! :-)
These are so awesome :) I would be overjoyed to receive
this!