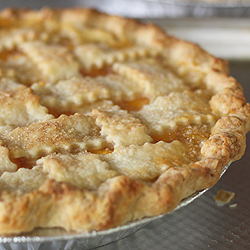
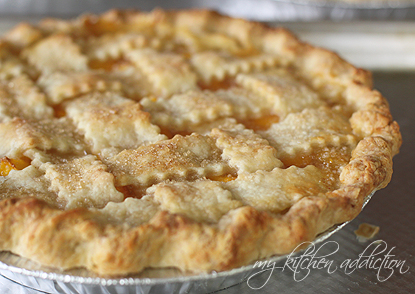
 I’ve said it before, and I’ll say it again. I love baking pies. And, I am especially fond of lattice-top fruit pies in the summer. Sure, lots of people like crumb pies or a regular lid-top pie… But, to me, summertime pies just beg for the woven lattice crust. I just love the way the luscious fruit filling peeks through the top of the pie.
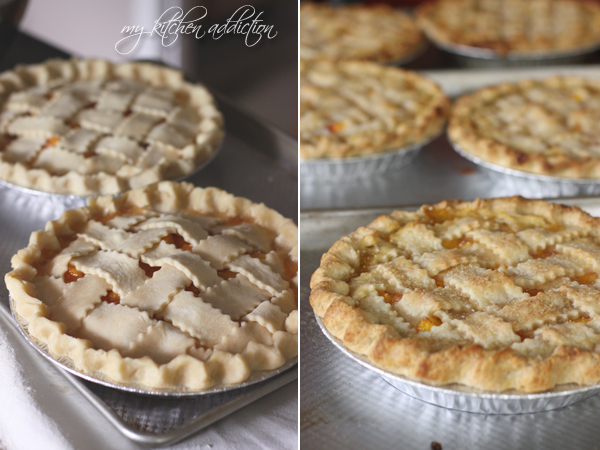
This past weekend, I helped out with the second annual peach festival at my church. A friend and I made peach salsa to sell, and I also made quite a few pies. Naturally, I opted to bake mine with a lattice crust. As I was doing it, I put a few photos up on Twitter, and I had quite a few people tell me that they wanted to learn how to bake pies with a lattice crust. It had honestly never really occurred to me before that the simple secret of weaving a lattice crust is one that may not be widely known. I do it so often that I just assumed that everyone knows what to do. But, we all know what happens when one assumes, no?
So, I decided to snap a few extra photos of the pies as I was baking so that I could share a quick tutorial on weaving a lattice crust. It’s really not something to be intimidated by. Once you know the method, there’s nothing to it. It always works for me, and I’m hoping it will work for you, as well!

A Few Words on Pie Crust…
Before we jump right into the pie crust method, though, let’s talk about pie crust for a few moments, shall we?
The one thing that many people find most intimidating about baking a pie is the crust. And, it can be hard to navigate all of the dfiferent recipes out there. Some use butter, some use shortening, some use lard… And, there are plenty that use a combination of different fats. I am personally a fan of all-butter pie crusts, but I think it’s best to find one that works for you and stick with it. The more times you make a pie crust, the easier it will become.
If you’re still looking for a recipe for pie crust, I have my favorite all-butter version here, along with some tips to help you along.
Lattice Crust Tutorial
Alright, now that we’ve got that out of the way, let’s get right to those beautiful lattice crusts.
Before you get started on the top crust of the pie, you do need to have a pie to cover. So, roll out the bottom crust, and place it gently in your pie dish. Trim the edges leaving yourself just about a half-inch of dough to work with around the edge of the pie. Then, add the filling. If you have a particularly juicy pie filling, be careful not to fill the pie too full, or you’ll wind up with a pie that bubbles all over in the oven. Of course, I have no experience with that!
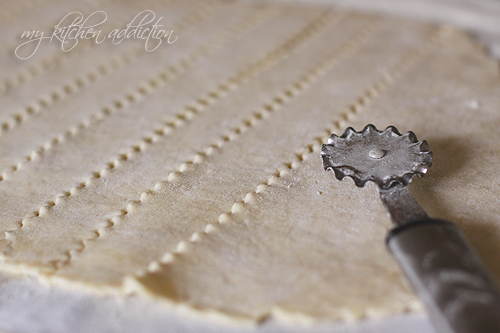
Once you’re ready to start on the lattice top, roll out the dough for the top crust of your pie. It should be a rectangle/oval that is as tall as the diameter of your pie dish (typically 9 – 10 inches). It should be wide enough to cut 10 strips of pie dough (about 10 – 12 inches will work). You can use either a pizza wheel or a pastry cutter to cut 10 even strips, each about 1 inch wide. Now you’re ready to start weaving.
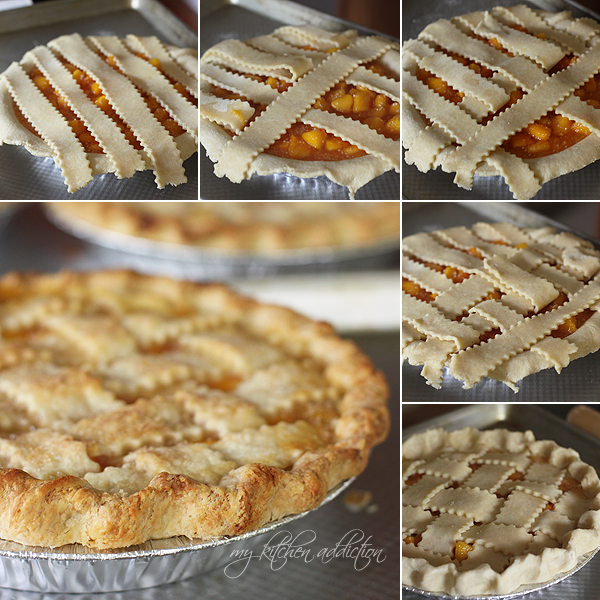
- Begin by placing half of the strips (5 of them) across your pie. They should be evenly spaced and all going in the same direction.
- Pull back every other strip of dough and fold it in half over itself. Take one of the remaining strips of dough, and lay it across the center of the pie, crossing over the strips of dough that you did not pull back.
- Fold the strips of dough back over the newly placed strip. Then, pull back the alternate strips of dough (every other strip again, the ones you didn’t use last time), and place a second strip of pie dough across the pie.
- Continue pulling back the alternate strips of dough and placing the remaining strips across the pie until your whole pie is covered and you have a perfectly woven crust.
- Trim any excess from the strips around the outside of the pie. Then, carefully fold the bottom crust up over the edge of the strips to secure them around the pie. Use your fingers to crimp the edges of the pie, as desired.
For an extra pretty pie, I usually opt to brush the top of the crust with a little bit of milk or cream. Then, I sprinkle the pie with raw sugar just before baking. It may take a little bit of practice, but with this easy method, you’ll be baking beautifully topped lattice crust pies in no time!

Your pies are so beautiful!!! Thanks so much for the tutorial. I may finally attempt lattice soon…
Look at those gorgeously woven pie crusts! That collage is stunning and you make it look as easy as it really is. :)
Your pies are always so pretty! My mom taught me how to make a lattice crust from the time I was little, but mine never turn out all that nice. The top looks good, but the edges are always a disaster. :)
Gorgeous!! There is nothing more satisfying than making a beautiful pie. Love this tutorial…I have never mastered a pretty lattice top :)
Jen, I’m not kidding when I say that’s the most beautiful peach pie I have ever laid eyes on. I WISH my pie crusts looked that beautiful.
Your pies are so freaking beautiful!! I just tried a lattice top for the first time this summer, and mine did not turn out nearly as nice as yours, haha. I’ll have to keep this post handy the next time I give it a shot!
I love lattice top pie but never mastered this beautiful art.
Great tutorial Jen!
It is so beautiful. I’ve never tried this, I don’t make pies often but you just inspired me to give it a try, such a delicious presentation. Scrumptious photography, too.
Oh how i wish i could make a pie that looks like that! That should be on a magazine cover!