 If you ask anyone in my family, they will tell you that these are the ultimate dinner rolls. But, I can’t really take credit for them.
These are my grandmother’s famous rolls… Whenever we would have get togethers with the whole family, she would make a big batch of these rolls. They were a holiday staple for years. My brother and cousins would fight over them, and I’m pretty sure that there were times where they each had more than 10 rolls in one meal. They really are that good.
My grandmother was a great cook and baker. Though she passed away a few years ago, I often think of her when I am in my kitchen. I am fortunate enough to have many of her recipes, and though I can’t prepare them quite the way she did, they always remind me of her.
Until recently, the recipe for her rolls was one of the few recipes that I didn’t have. In December, my mom and I were putting together a book of family recipes for my brother and his new wife. When we asked around for recipes, one of my cousins happened to have the recipe for the rolls. We put it in the book (especially since my brother was one of the biggest fans of the rolls), and I set out to learn to make them myself.
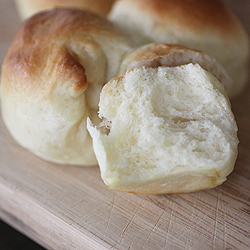
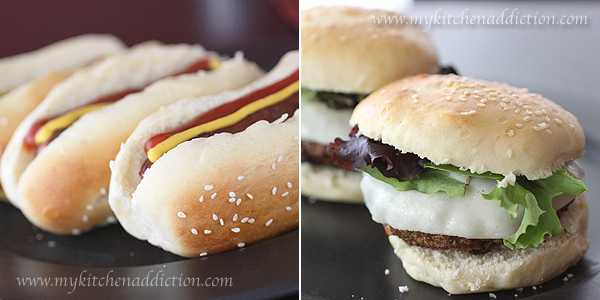
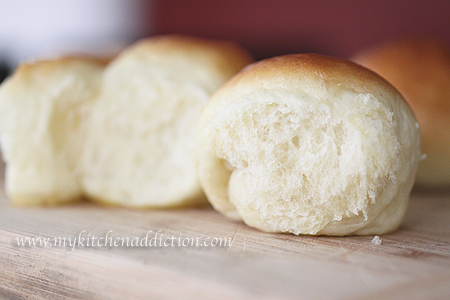
Perhaps my grandmother is looking down on me, because there’s just something about these rolls that always amazes me. They really are quite simple to make, and they always turn out beautifully. They are the lightest, softest dinner rolls I have ever made. They’re also pretty adaptable. I have swapped out the all purpose flour for whole wheat, added flax, used oil in place of the butter, and even made them with herbs and cheese. The rolls also make fantastic buns for hot dogs and hamburgers… You’ll want to keep the recipe on hand this summer!
Though I’d encourage you to try your own versions of these rolls, I really do think that the original is the best. I’ve halved the recipe here, and have adapted it slightly to use readily available dry active yeast. There are no fancy flours and they may not be packed with extra fiber and whole grains… But they are perfect in their simplicity. They are one of my family favorites, and I hope you’ll enjoy them as much as I have!
Light and Soft Dinner Rolls
(Makes 18 dinner rolls or 12 sandwich rolls)
- 1 cup warm milk
- 1/4 cup granulated sugar
- 2 1/2 teaspoons dry active yeast
- 1 teaspoon Kosher salt
- 1 egg
- 1/4 cup (1/2 stick) unsalted butter, softened
(or cut it into small chunks and microwave for about 15 seconds) - 3 – 3 1/2 cups all purpose flour
- Egg wash (1 egg + 1 teaspoon water), optional
- Sesame seeds, optional
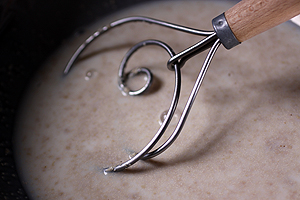
Begin by combining the milk, sugar, yeast, and salt in a large mixing bowl. Whisk together until the yeast and sugar are mostly dissolved.
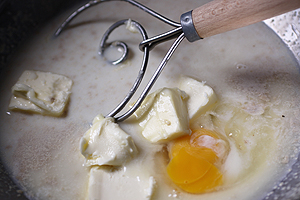
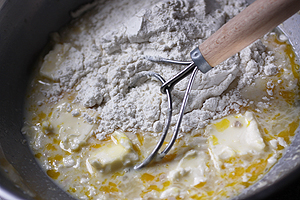
Add the butter and egg. Stir to incorporate and break up the egg. Add 1 cup of flour and beat vigorously to fully incorporate the flour and any lumps of butter that may have been remaining.

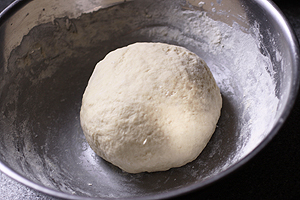
Gradually, add the remaining flour, stirring until the dough begins to pull away from the sides of the bowl. Knead the dough with your hands, adding just enough flour to keep the dough from sticking to your hands. Knead for about 5 minutes, until the dough is smooth, but still light and soft.
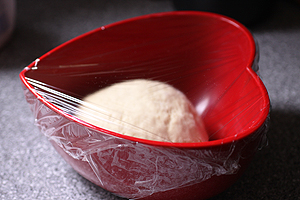
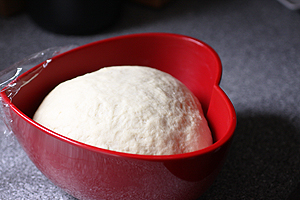
Transfer the dough to a lightly greased bowl. Cover with plastic wrap and let rise in a warm place until the dough has doubled in volume (about 1 1/2 hours). Punch the dough down, reshape into a ball, and let rise a second time until the dough has doubled in volume again (an additional hour).
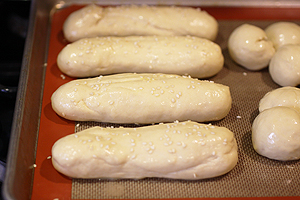
Preheat the oven to 425°F. Shape the rolls and place them on a baking sheet lined with parchment paper or a silicon liner. Let the rolls rise while the oven preheats, until they are a bit puffy. If desired, brush the tops of the rolls with some egg wash (to make them shiny) and sprinkle with sesame seeds (I usually do this for the hot dog and hamburger buns). Bake for about 12 – 14 minutes, until the rolls are golden on top.
Let the rolls cool for about 10 minutes on the baking sheet, and then transfer to a wire rack. The rolls are best served warm, but they will keep for a few days in an airtight container, or wrapped in plastic.

How mean 3- 3 1/2 cups = 3 cups and 1/2 cups but added in 3 Times or 3 cups and 1/2 cups multiplied by 3 ?? ( I ‘m french sorry !! )
Thank you !! :)
Hi, Camomille – I apologize for the confusion, I meant that the recipe could use somewhere between 3 cups and 3.5 cups. Because it is a bread recipe, the amount of flour needed will vary slightly each time you bake the rolls. Hope that helps!
Hi Jen,
I’m hoping you can tell me where I went wrong. I did everything exactly as you suggested. The dough rose beautifully, I punched it and let it rise again- which it did. Then I made balls and let them sit for a few minutes while the oven got hot and I cooked them. They came out dense and heavily yeasty instead of light and fluffy. I thought I did it perfectly too! Do you ever let it rise once then make them into balls and let them rise in balls and cook them? I’m wondering if that would help? I’d love to hear your thoughts! Thanks for sharing!
Hi, Julie – Yes, you want to let them rise again once you shape the rolls (into balls or whatever shape you want)… They should be “puffy” and if you lightly touch the sides, your finger should leave an imprint. That will let you know that they are ready to go in the oven. Hope that helps!
Can these be made to a point then freeze the balls so they can be removed from the freezer to thaw and rise then baked? If so can I get instructions for this. Thank you so much.
I have such a tight busy weekly work schedule that if I can make a large batch and freeze I can us them during the week.
Thank you again for your time.
Hi, Marrie – Yes, you could do that. Simply do the two rises in the bowl. Then, deflate the dough and shape the rolls as you would for the recipe. Put them on a sheet pan and freeze. Then, once the rolls are frozen, transfer them to a plastic bag to store in the freezer. On the day that you’d like to bake them, I’d recommend taking them out of the freezer and transferring them to a baking pan/dish in the morning. Cover and let them rise in the refrigerator during the day. Then, you can take them out and bake them as directed before dinner.
Hi, Jennifer. I came across your recipe about 6 months ago and this has become my go-to roll recipe! It is so easy, especially when I make it in my stand mixer. The rolls turn out perfect every single time! The dough is sweet enough that I may try to use it for cinnamon rolls. Thank you so much for the recipe! Nancy
I just wanted to say, I found this recipe a year or two ago and it is my go to bread roll recipe now. I make these things about once or twice every month, sometime more if there’s a party. Everyone absolutely loves them. Thank you for sharing the recipe. It’s an absolute winner.
Thank you so much for sharing this recipe. They came out perfect, so light and soft, just like the store bought minus the added preservatives and other harmful stuff.
Greetings from Malta.
Anita
I am a teacher looking for a dough my students can roll into cinnamon sweet rolls and then refrigerate overnight to bake the next class day. Will this work? how long will they need to rise on day two before baking? Thanks, Kate
Hi, Kate – Yes, you could refrigerate overnight and bake the next day. You would want the rolls to come to room temperature the next day and then rise just a bit. I don’t know the exact time, but I would plan on 2 – 3 hours. Hope that helps!
Just baked a batch of these rolls and they are just as you described the, “light and soft” and delicious.
I’ll be making sweet rolls with cinnamon sugar using this dough recipe.
Thanks for sharing.
HOW WOULD THIS WORK WITH RAPID RISE YEAST? DO I DO THE 10 MIN AS ON
PKG AND THEN DO THE FINAL RISE OF ONE HOUR? THANKS M.
Hi – It will work similarly to using active dry yeast. I don’t go by the times on the package, but test the dough to make sure it has risen properly (indent of 2 fingers remains for first rise, rolls are slightly puffy for second rise).